You don’t have to be a professional videographer to benefit from including movement on your Showit website. Before I show you how to add videos on Showit websites, below are a few reasons video is a valuable marketing tool.
According to Fixed:
- Short landing page videos can increase conversion by close to 130%.
- Websites with video content rank 53 times higher than websites without video content.
- Video content is likely to increase purchase intent by up to 97%.
On top of these stats, video is one of the best assets to keep users engaged and on your website longer. Keep reading to learn five methods to add video on Showit websites.
1. Showit Hosted Video
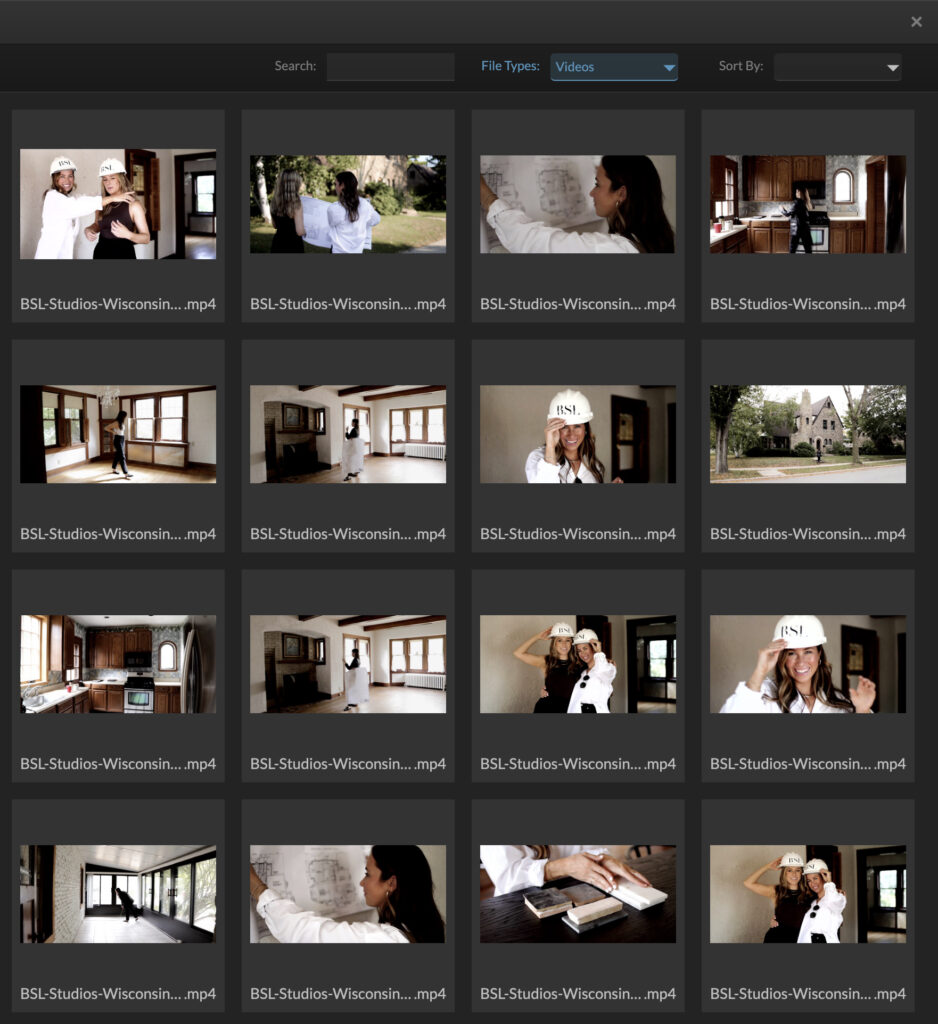
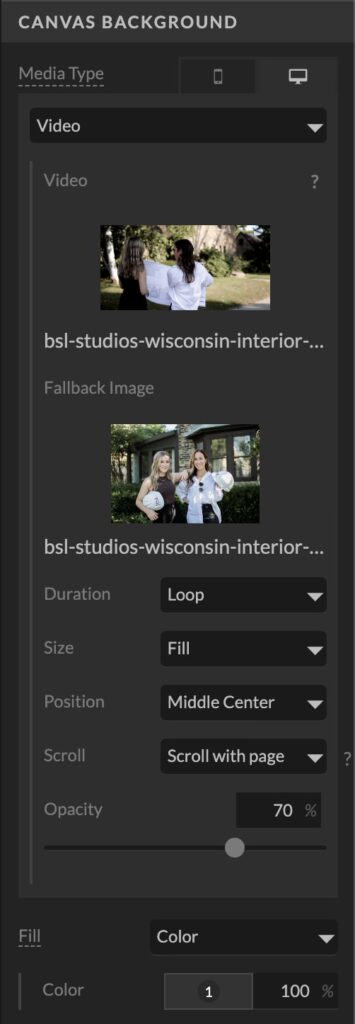
The most innate method of adding video on Showit websites is hosting the video in Showit itself. Adding a video (8MB or less and formatted as an MP4) to your Showit media library lets you easily add it as a canvas background anywhere on your website. See canvas background videos in action here.
Pro:
Since this method functions as a canvas background, it will be responsive across different screen sizes.
Con:
With a limit of 8MB, this can potentially cause a loss of video quality, especially for longer videos. I recommend this method for b-roll footage.
2. Vimeo or YouTube Video on Showit Websites
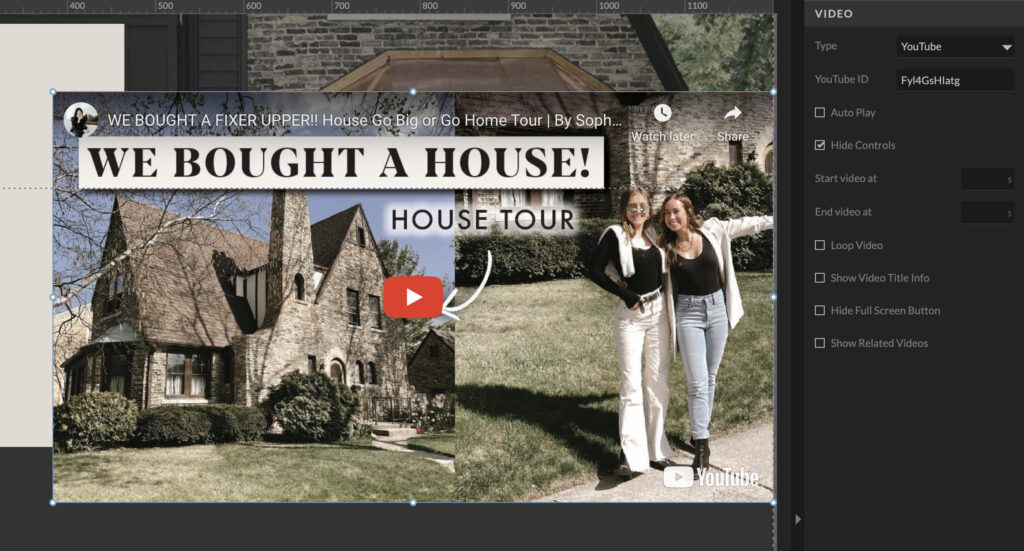
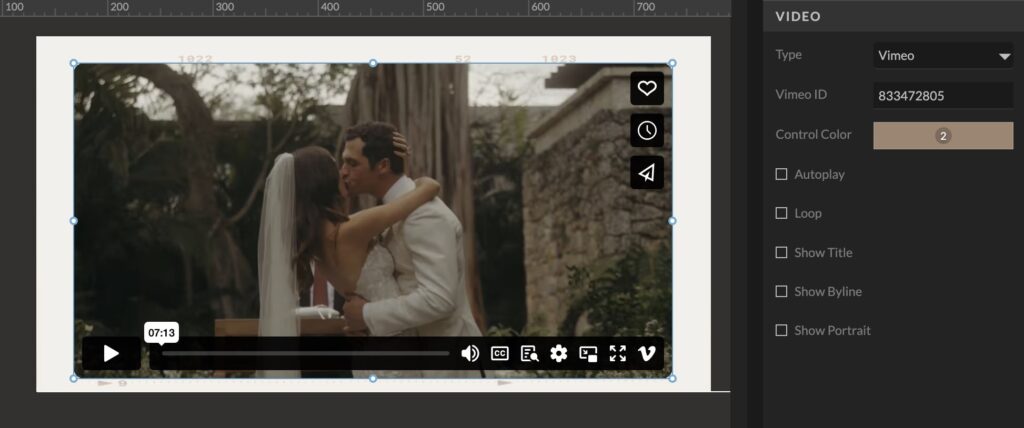
The best way to incorporate video on Showit websites that are longer or require audio is by embedding via Vimeo or YouTube. After uploading your video to either platform, you can embed it using Showit’s in-app widgets with the end of the URL. See Vimeo embeds in action here.
Pro:
This method allows you to utilize lengthier footage with audio.
Con:
Embedded videos are not responsive across different screen sizes.
Designer Hack:
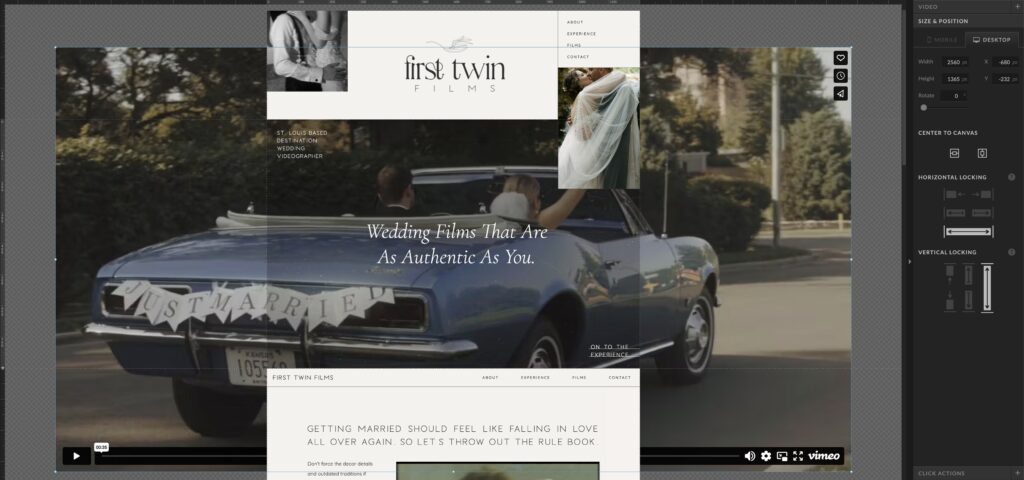
To make your embedded video a canvas background and appear responsive on most screen sizes, you can set your desktop canvas to window height, add horizontal and vertical edge locking, and increase the size proportionally to a width of 2,560 pixels. Note: this will allow you to crop out the player controls and avoid black bars, but parts of the video will be cropped on smaller screens.
Designer Tip:
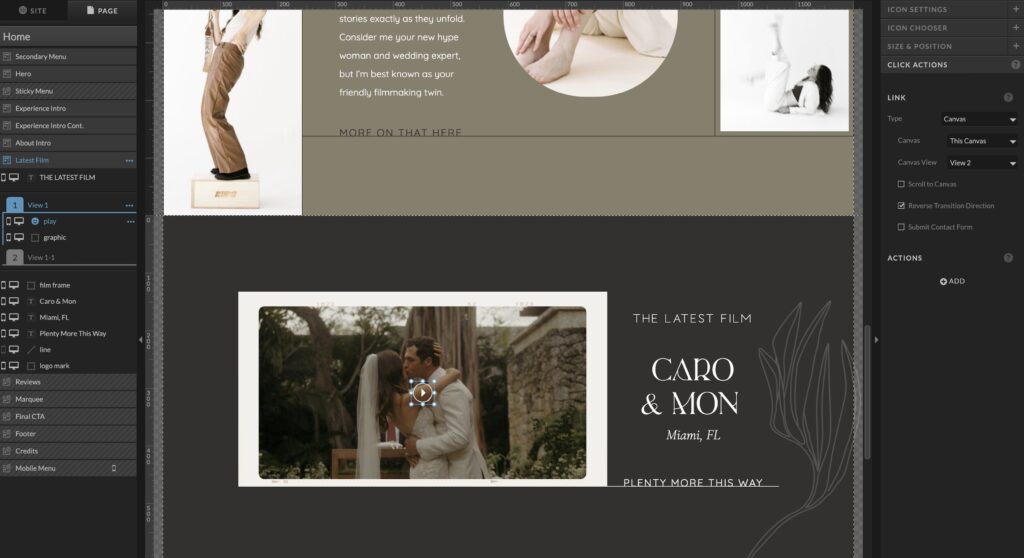
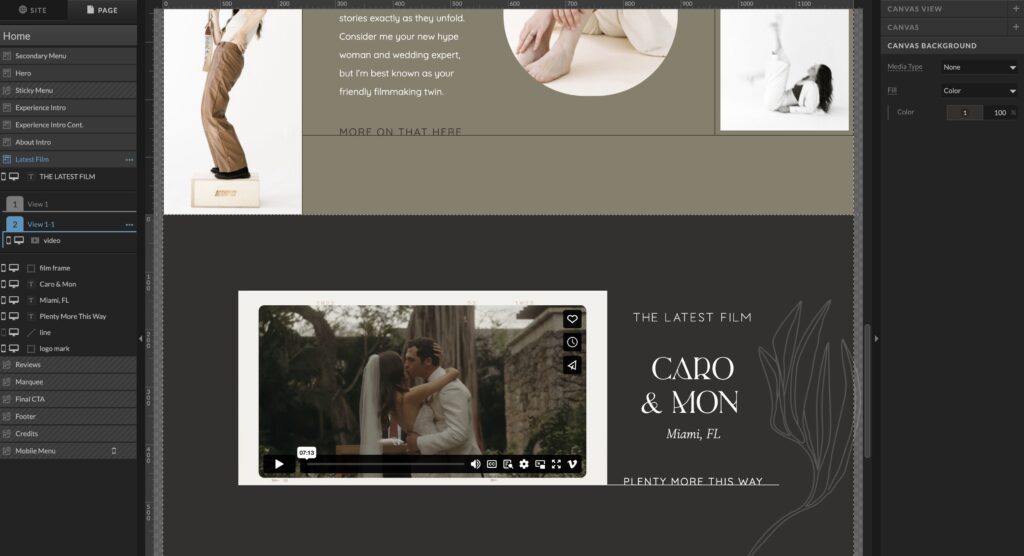
If you’re concerned about player controls or Vimeo/YouTube branding throwing off the aesthetics of your design, a solution is to add some canvas views. First, add a still cover image and a play icon in canvas view 1. Next, set the image and icon to click actions that link to canvas view 2. Finally, embed your video in canvas view 2.
3. GIFs on Showit Websites
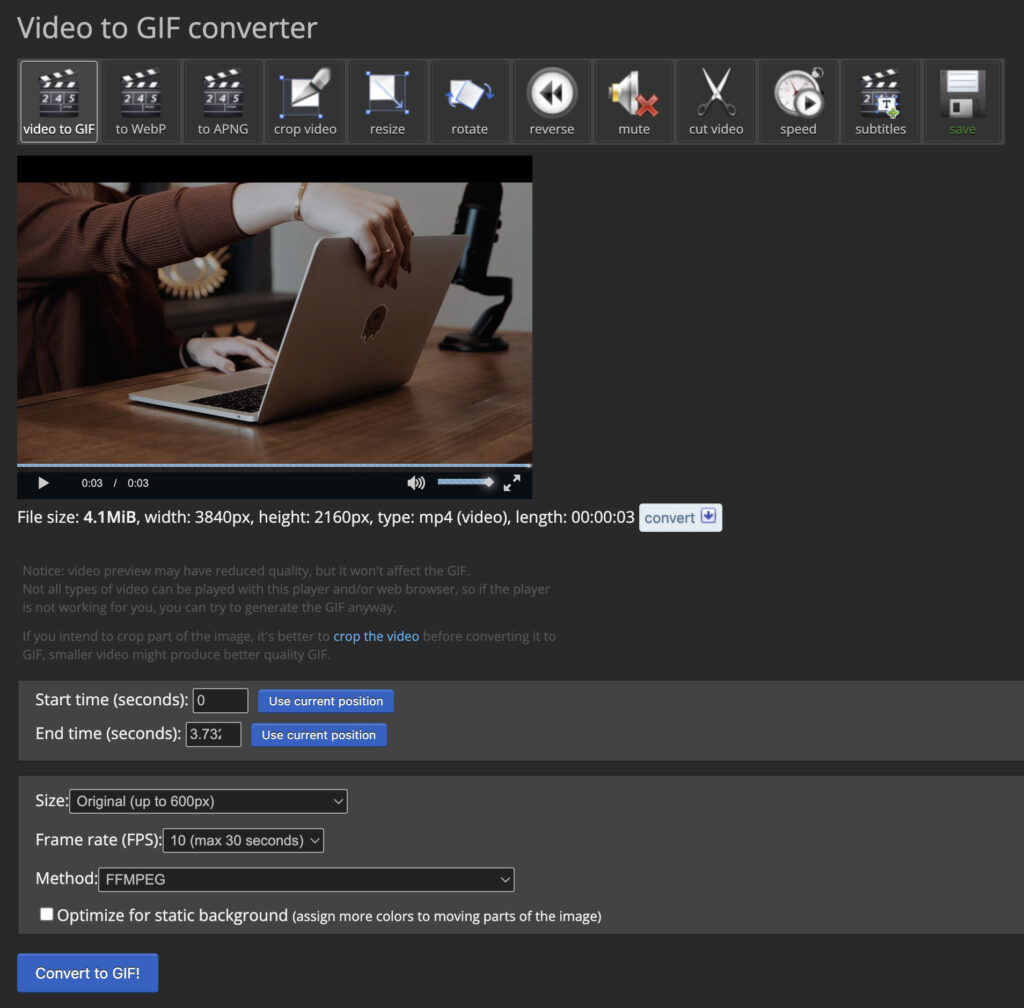
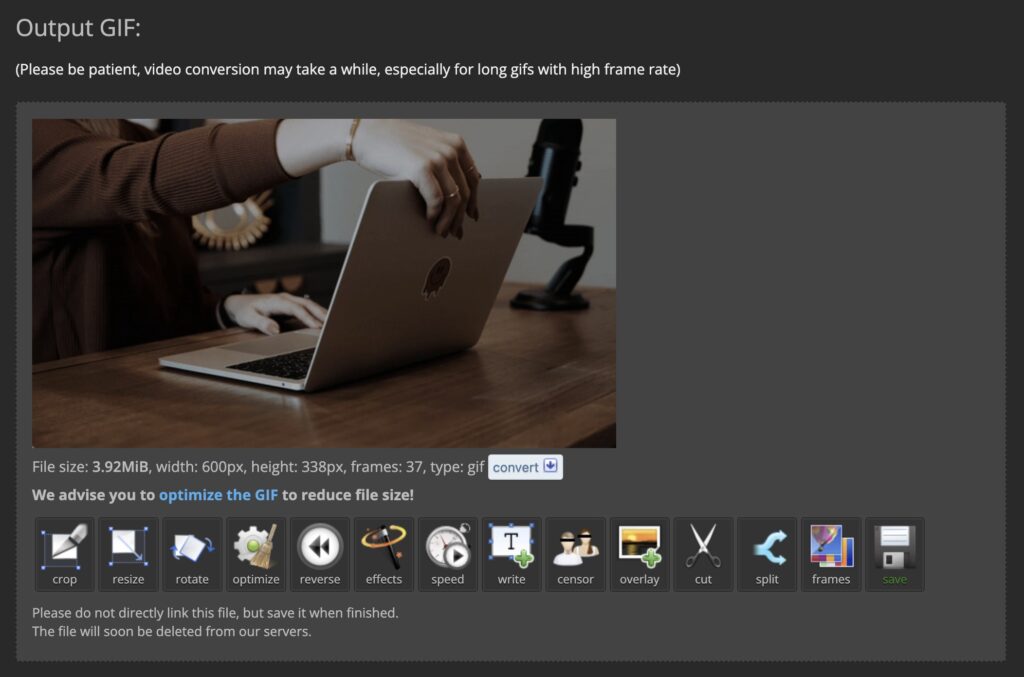
GIFs are my favorite way to add dynamic, fun motion and video on Showit websites. You can use a series of photo clips, existing videos, or animation to create GIFs in Photoshop, Ezgif, or other editing programs. For example, I can convert a short video file into an optimized GIF in minutes using Ezgif. See GIFs in action here.
Pro:
GIFs don’t have to be used as canvas backgrounds only, so you have more design freedom and control of their placement on a page.
Con:
Showit servers will not resize GIF files, so too many GIFs or large GIF files can significantly slow your page speed.
4. Simple Galleries & Canvas Views on Showit Websites
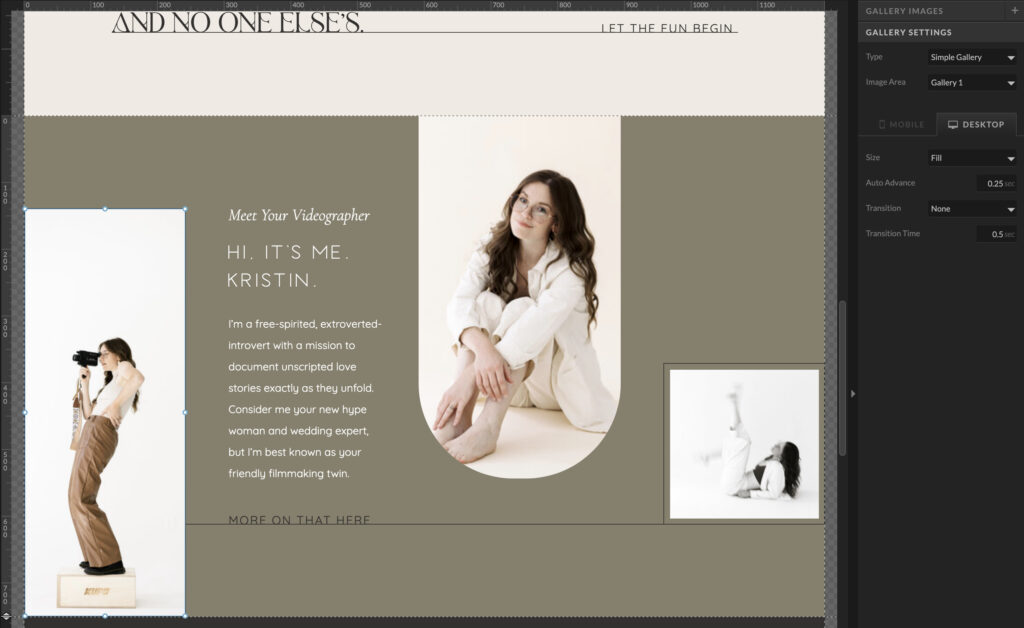
Another in-app method to add motion on Showit websites is setting simple galleries and canvas views to auto-advance. If done right, you can create what looks like a GIF right inside the Showit app. See this in action here.
Pro:
This is the quickest and least technical method for adding motion that mimics video content.
Con:
Because no actual video content is used, the motion may not be as seamless.
5. Hover & Transitions Effects on Showit Websites
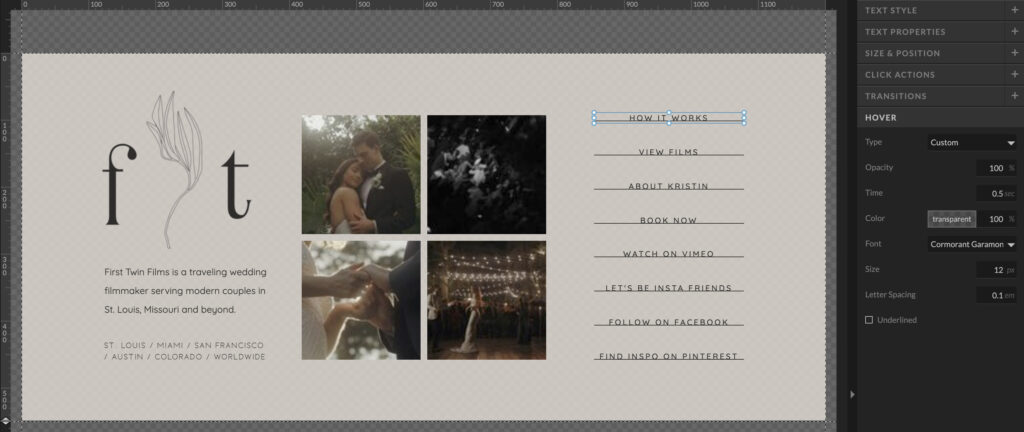
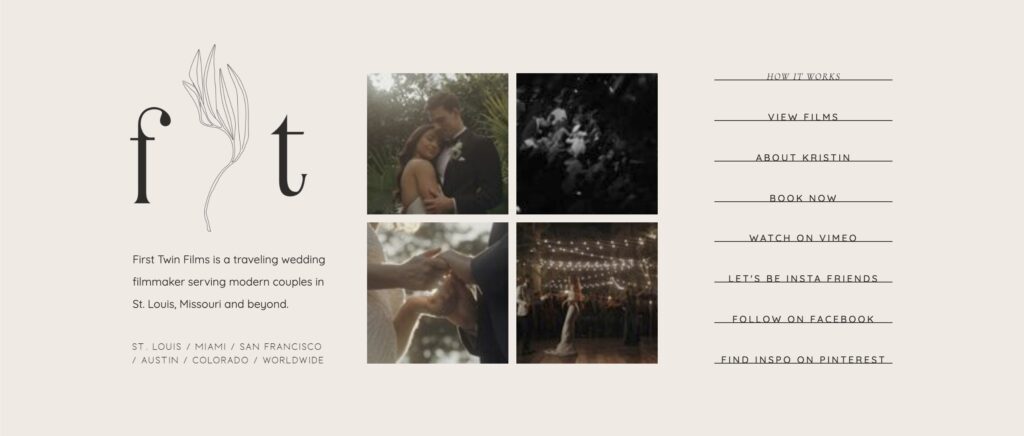
One final method to add motion on Showit websites is hover and transition effects. Hover actions apply to mouseover effects, while transition effects apply to how elements initially appear on a page. My go-to of the two is adding hover actions to button text to emphasize call-to-actions—see it in action here.
Pro:
This simple detail creates a more interactive experience for users.
Con:
Too many hover and transition effects can be distracting for some users.
Bonus Tutorial & CSS Motion Snippets
If you got this far, you deserve a bonus! Here are a few of my favorite CSS motion snippets and tutorials to add movement on Showit websites:
Typewriter Effect
Thanks to Sam and Rachel at Northfolk, advanced Showit users can add a typewriter effect to any text in Showit. For more exclusive resources, click here to join their designer program!
Rotating Effect
If you’re an advanced Showit user and want a graphic to rotate on your website, add this code to the page’s Advanced Settings panel Custom CSS box:
.d .yourimageclass {
  animation: rotation 5s infinite linear;
}
@keyframes rotation {
  from {
    transform: rotate(0deg);
  }
  to {
    transform: rotate(359deg);
  }
}

.m .yourimageclass {
  animation: rotation 5s infinite linear;
}
@keyframes rotation {
  from {
    transform: rotate(0deg);
  }
  to {
    transform: rotate(359deg);
  }
}
Marquee Effect
To add a marquee effect, or moving announcement bar, to a website, advanced Showit users can add this code to an embed box:
<style>
body {
margin: 10;
padding: 0;
color: #ffffff;
font-size: 15px;
}
@font-face {
font-family: cutive mono;
}
div {
font-family: cutive mono;
}
.marquee {
position: relative;
width: 100vw;
max-width: 100%;
height: 2000px;
overflow-x: visible;
}
.track {
position: absolute;
white-space: nowrap;
will-change: transform;
animation: marquee 60s linear infinite;
}
@keyframes marquee {
from {
transform: translateX(0);
}
to {
transform: translateX(-50%);
}
}
</style>
<div class="marquee">
<div class="track">
<div class="content"> YOUR MESSAGE REPEATED HERE | YOUR MESSAGE REPEATED HERE | YOUR MESSAGE REPEATED HERE | YOUR MESSAGE REPEATED HERE | YOUR MESSAGE REPEATED HERE | SYOUR MESSAGE REPEATED HERE | YOUR MESSAGE REPEATED HERE | YOUR MESSAGE REPEATED HERE | YOUR MESSAGE REPEATED HERE | YOUR MESSAGE REPEATED HERE | YOUR MESSAGE REPEATED HERE | YOUR MESSAGE REPEATED HERE | YOUR MESSAGE REPEATED HERE | YOUR MESSAGE REPEATED HERE | YOUR MESSAGE REPEATED HERE | YOUR MESSAGE REPEATED HERE | YOUR MESSAGE REPEATED HERE | YOUR MESSAGE REPEATED HERE | </div>
</div></div>
